
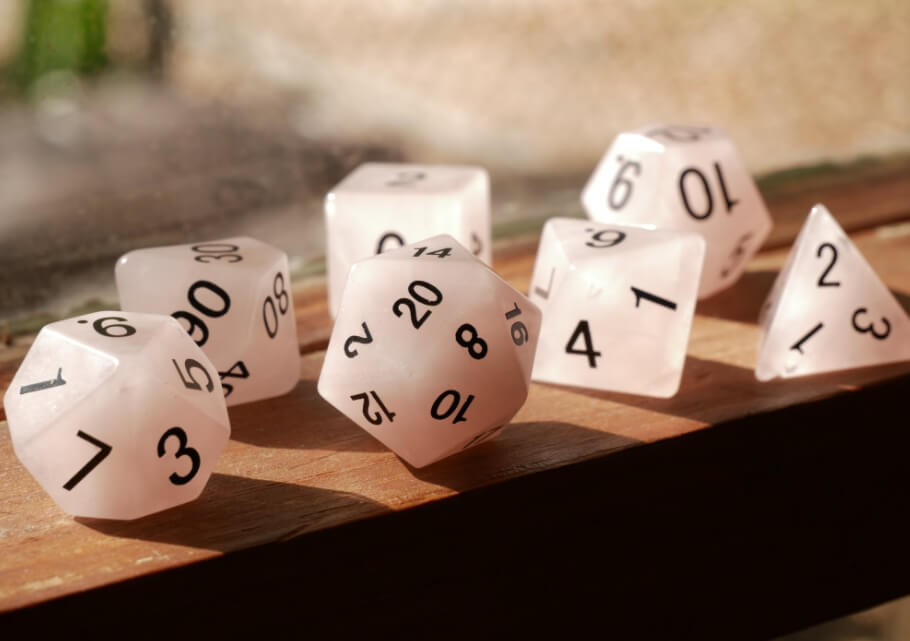
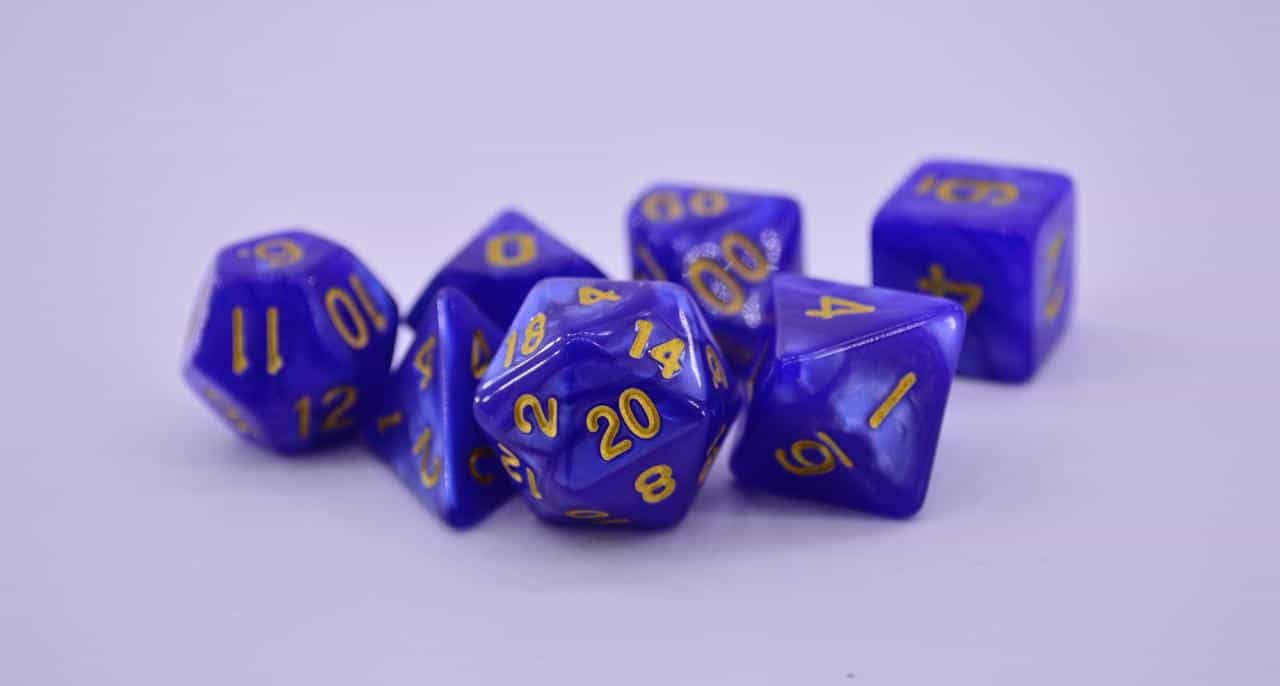
Making dice, be them DND dice, or just traditional gameplay dice, is a popular and fun project for your epoxy resin. How can you make your own dice? It involves your favorite resin, a dice mold, and patience and time to get all of those details just right!
Not sure it’s as easy as it sounds? As an experienced, 5-year resin artist, I’m looking forward to sharing my tried and tested tips with you to make the process easy and a whole lot of fun! Ready to get into the creation process? The steps to make your very own customized DnD dice or just normal dice for gameplay, are as follows:
- Preparation
- Mixing the resin
- Adding glitter or other items
- Fill the molds with resin properly
- Curing
- Demolding
- Polishing and finishing
- Inking
Preparation
Set up the space that is the right size for your design, and make sure you’ve got everything you need: your resin, mixing cups, your baby wipes for cleaning, a respirator mask, gloves, and, of course, the right dice resin mold for the job itself!

This is a careful step to get right, as the quality of the mold will impact the quality of the final set of dice that you get on the other side! Pick the right mold for the dice that you’re looking to make, too.
Mixing the resin
When you’re ready to start working, you’ll want to carefully read through the instructions on the resin that you’ve chosen, and understand what you should do to mix it up properly.
For the best results, read through the instructions thoroughly, and follow them as exactly as possible. This includes safety equipment such as gloves, glasses, masks, etc.
Adding glitter or other items
Before you start to pour it into the mold, you’ll want to add in anything extra that you want to put in to give your set of DnD dice a special flair. Perhaps glitter, another colour for a swirl, a bead or charm, etc. Think outside the box and have fun with it!
Fill the molds with resin properly
As far as the project is concerned, this is going to be one of the most important steps and it is often something that needs a little practice.
Pour half to three quarters of the resin into the mold for each die that you want to make. Before you finish it, you’ll want to take a toothpick or a stick that you buy purposely for resin use, and use that to poke around in the corners of the mold.
Essentially stir the resin around gently and help tease out any air bubbles that may have crept in and will create a bump in your mold as it cures. Be slow and thorough with this step to help get it done properly!
When you are done this, you can pour in more resin, but make sure that you don’t fill it up all the way! Just like with ice cubes, this will be larger in a solid state than it is in a liquid state!
Some resin users will tell you to use a lighter to get the bubbles out “easier”, but this will actually weaken your silicone molds. You’ll want to use the toothpick/stick method only in order to protect the longevity of your mold.
Curing
This is the hardest part, I know! You’ll need to wait at least 24 hours for proper curing. Trying to demold your dice before this time has passed will leave it sticky (and useless) and will always mean harder cleaning for your mold, too.
It’s important to read the instructions on your resin for curing time. It could be less and it could be more. Always err on the side of caution and make sure that you always give it the time it needs! You don’t want to have all of the time wasted, right?
Demolding
Once you’ve got your resin mold ready to go, you can then get ready for the demolding process! In order to make this tense process easier, you can use a demolding spray before you put your resin in.
If you forget or don’t have one, however, this is easier to do if you are patient and wait for the entire curing time without trying to cut it short.
In either case, gently push the mold free of the dice with your fingers. Don’t force it, or it may weaken and/or rip your mold, meaning you’ll need to throw it away. If it doesn’t come free, give it more curing time.
If it still doesn’t budge, and the mold is totally cured, you can put the mold in warm water to make the silicone expand and free your stubborn resin.
Polishing and finishing
Do you see little resin right along the edges and sizes of your dice? This is normal and a sign that your mold worked! You’ll need to gently remove it, called sprue, with a knife to make sure that your dice roll normally. Carefully use a knife or a blade to do this.
When you’re done, you can “make it invisible” by using a fine-grit sandpaper over the rough edges of the cuts. Start with a 150 grit and work your way all the way to 3,000 to give it that ture polished finish that is going to make your dice look amazing! They should roll freely.
Next, use a microfiber cloth and a purpose-designed resin polish to give it that glossy look that you’ll recognize from traditional sets of dice!
Inking
After choosing your ink color, use a soft paint brush and brush the entire die over to ensure that you don’t miss any spots. The wipe it clean with a baby wipe, making sure that you get just the surface of the dice rather than the grooves with the numbers.
While using resin molds takes time and practice, making your very own customized st of dice is a pretty cool project! Enjoy the process and don’t forget to customize them! Worst case scenario, practice makes perfect!